
Populate other fields based on a selection in a SharePoint list
When using a SharePoint data component, the selected item is stored as an object rather than only the field shown in its label. By default this includes all columns. If the component’s Fields setting is configured, only those selected fields are retained. Include every field that later calculations or content need.
For instance, let’s consider a SharePoint list with columns like “Title,” “Name,” “Email,” and “Department.” This list is used to populate a SharePoint drop-down menu, which displays the “Name” column. However, it’s important to note that while the drop-down list only shows the “Name” column, all other columns are also stored in the response.
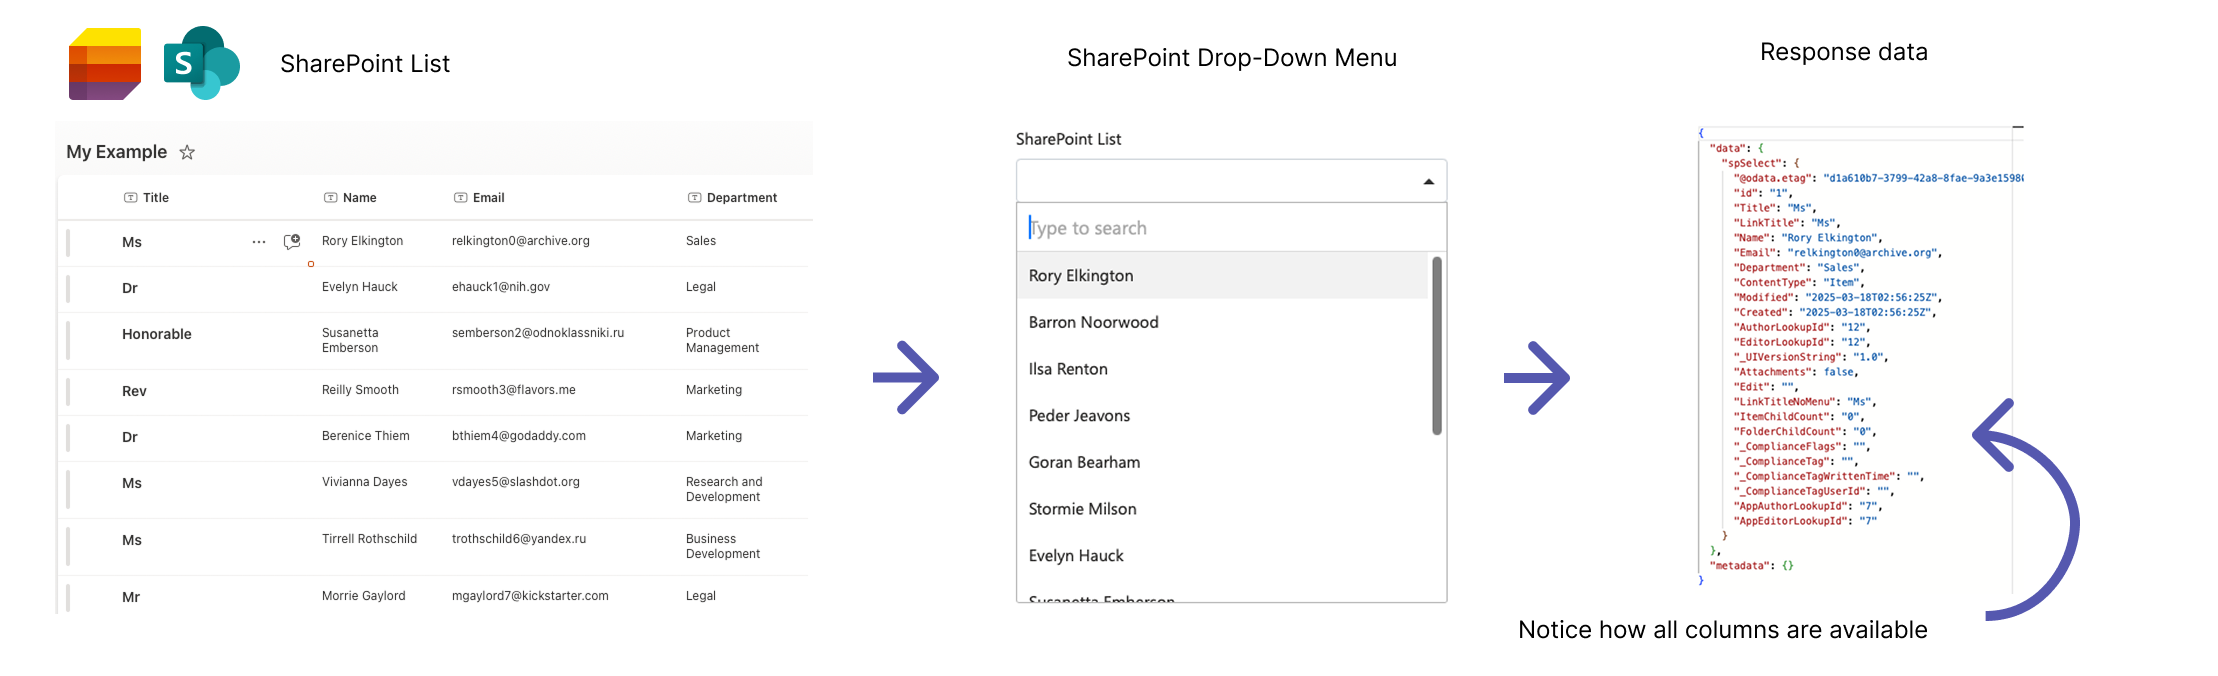
You can preview the data object’s contents at any time by navigating to the “Preview” tab on the form builder screen and clicking the “{}” button. This will display the raw JSON response, enabling you to easily visualise how the data is structured and aiding you in understanding how to access specific fields.
Populating a Textfield
-
Setup your SharePoint data component
-
Drag and drop a text field into your form and navigate to the data tab
-
Under “Calculated Value” use an expression to set the value based on the SharePoint drop down. You can use the property accessors to access other fields/columns associated with the selected SharePoint item.
Here is an example, however you will need to update the expression for your specific form and available fields/columns
value = data.spSelect.Department
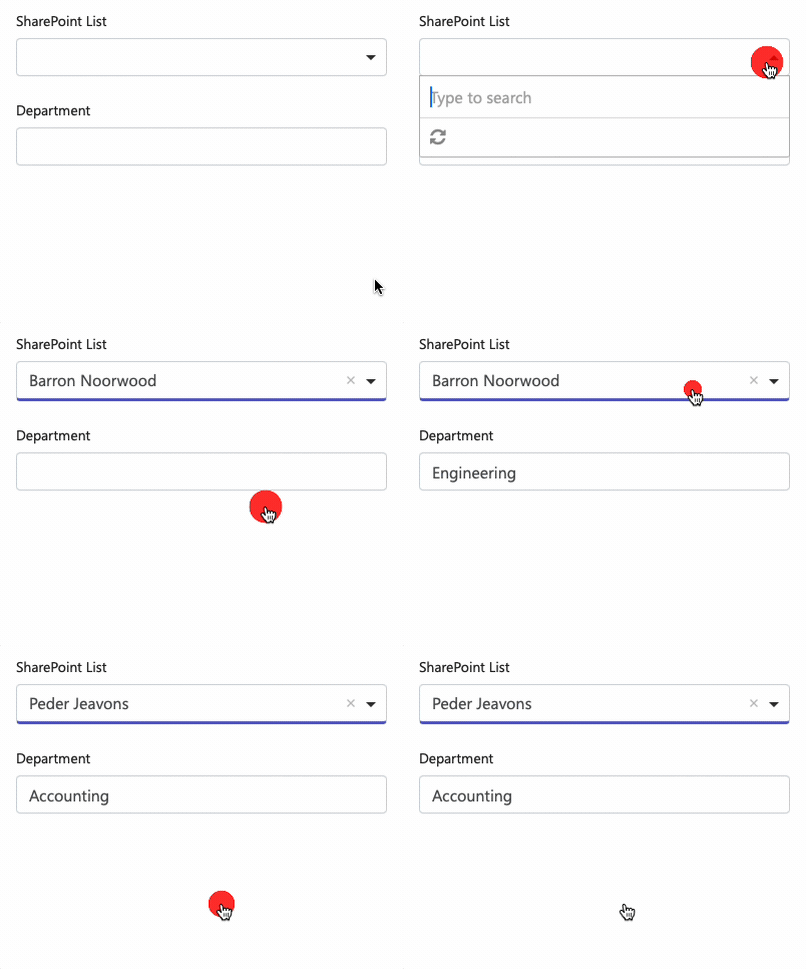
Populating a Content Component
Section titled “Populating a Content Component”-
Setup your SharePoint data component
-
Drag and drop a content component into your form
-
Within the content you can reference stored values using Form.io interpolation. This is not arbitrary JavaScript.
Name: {{ data.spSelect.Name }}Email {{ data.spSelect.Email }}Department: {{ data.spSelect.Department }}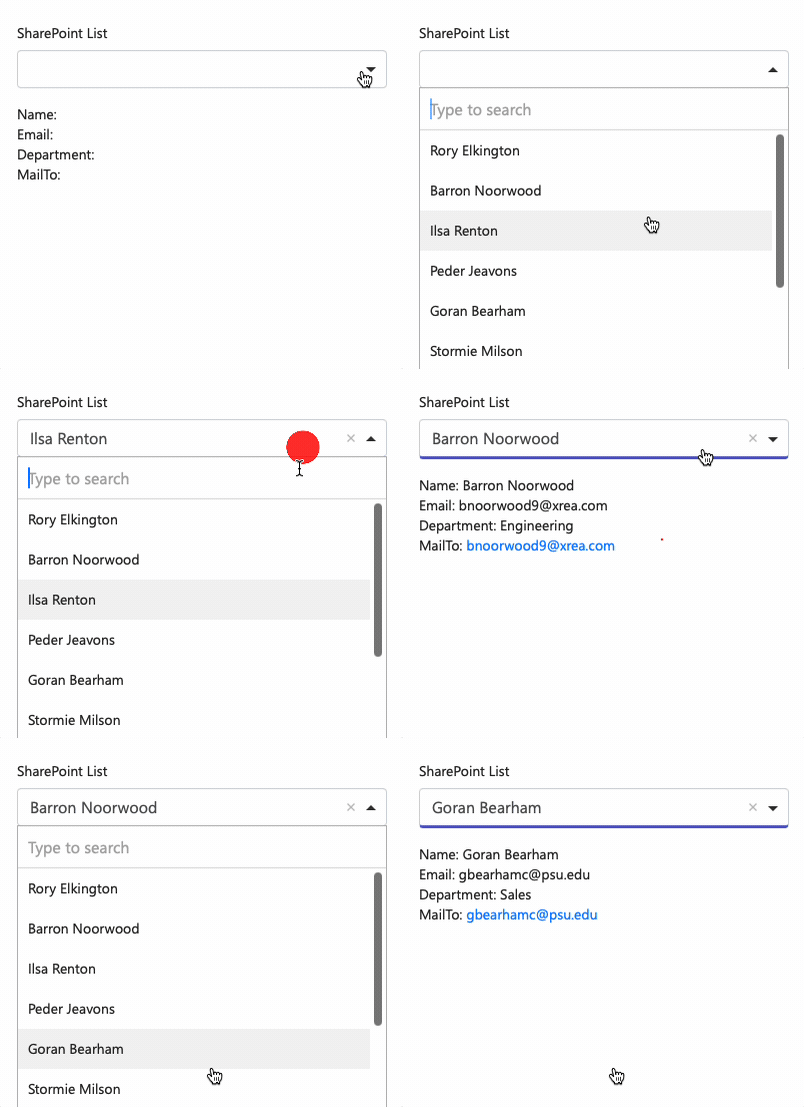
Populating a HTML Component
Section titled “Populating a HTML Component”-
Setup your SharePoint data component
-
Drag and drop a HTML component into your form
-
Within the HTML content you can interpolate the stored SharePoint value between curly brackets. In the example we dynamically construct a hyperlink based on the user’s email.
<a href="mailto:{{ data.spSelect.Email }}"> {{data.spSelect.Email}} </a>
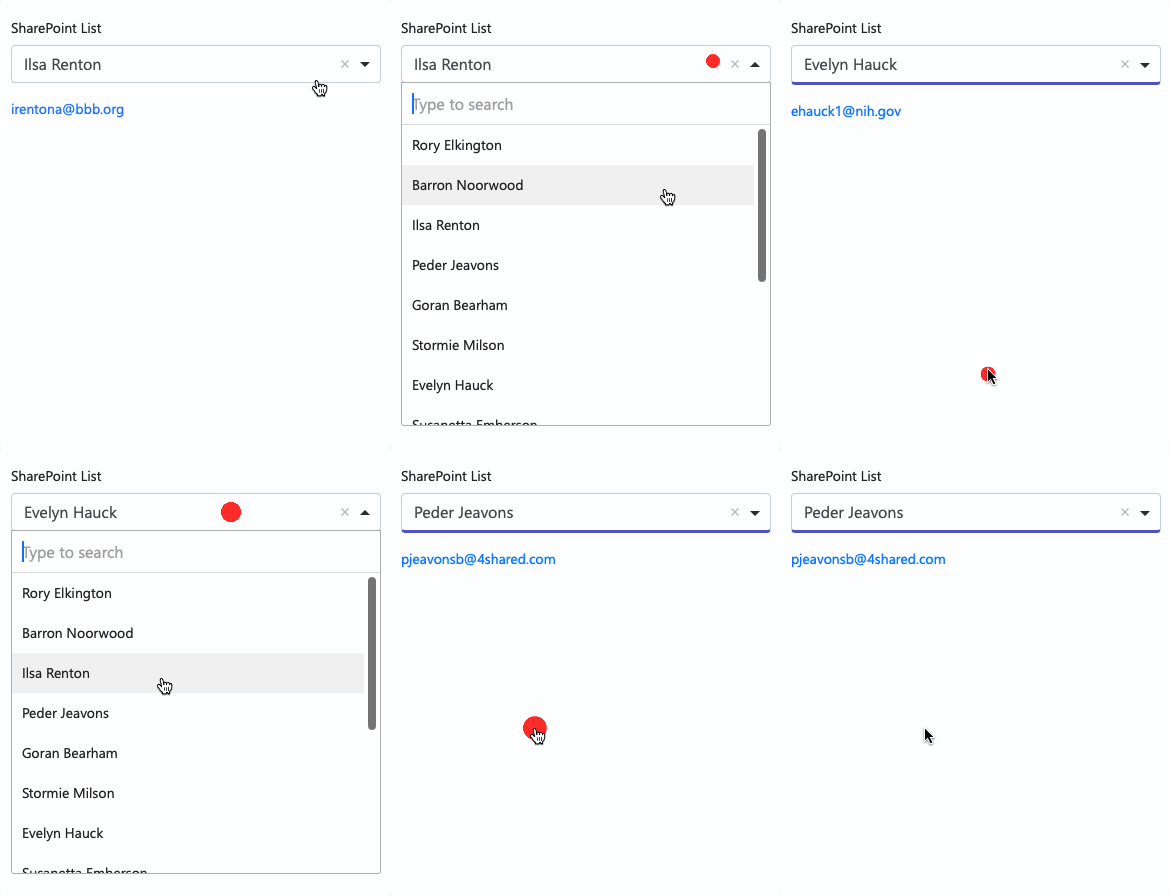
Related articles
Section titled “Related articles”- Calculated Fields
- Conditionally show question based on the response to a SharePoint drop-down
- Populate a data-grid based on a data-source
- How to Correctly Display Date/Time Fields from SharePoint Lists in Team Forms
- Allow Users to Manually Input Data into a Drop-Down Menu
- Data-source component schema